Pixels are the tiny dots that make up any digital image. If you zoom in closely enough, almost any image will be made up of these small blocks of colors. When an image is pixelated, it means that these pixels have become enlarged or distorted. This often happens when an image is resized or compressed in a way that reduces its resolution. If you have a photo that has been pixelated, there are a number of ways to fix it. Most of them involve using software like Photoshop or GIMP, but there are some more simple tips and tricks you can use to fix your pixelated images.
What is pixelation & what causes a pixelated image?
Pixelation is the loss of clarity or legibility of text or an image due to the reduction in the number of pixels used to represent the image, or “the reduction of the image resolution”.
It is the result of too much information being crammed into too small a space. When this happens, the individual pixels that make up the image become visible and the image appears to be made up of tiny squares. Pixelation can be caused by a number of factors, including:
Resizing an image: When an image is resized, either larger or smaller, the pixels that make it up have to be recalculated. If the image is made significantly larger or smaller, this can cause pixelation as the computer struggles to accurately redraw the image.
Compression: When an image is compressed, data is removed from it in order to make it smaller. This can also cause pixelation, as some of the information that makes up the image is lost.
Poor signal: A poor signal can cause pixelation as the image is not being transmitted clearly. This can be due to a number of factors, including interference, distance from the signal source, or damage to the transmitting equipment.
Detailed Tutorials on How to Fix Pixelated Images
Traditional image editors, such as Photoshop, can only slightly smooth the edges and make the image look blurry. And this type of image editor is not friendly for the novice who has no editing experience. Thankfully, the internet is full of tools to help you save a pixelated image and make it look as good as new. AI-based enhancer is such a good solution.
AVCLabs Photo Enhancer AI is a powerful, easy-to-use AI software that can help you improve your photos quickly and easily. As a dedicated image upscaler that uses deep-learning-based super-resolution, it can automatically put the missing pixels in the right place, and genuinely restore the details. As stated before, resizing an image, especially enlarging a low-resolution image, can easily cause a pixelated image. However, trained on millions of images of different types, AVCLabs Photo Enhancer AI can upscale the image by 400% times without causing image pixelation, and even improve details.
Steps to Fix Pixelated Images and Enhance Image Quality with AVCLabs Photo Enhancer AI
Step 1: Run the Program and Upload Images
Download and run AVCLabs Photo Enhancer AI.

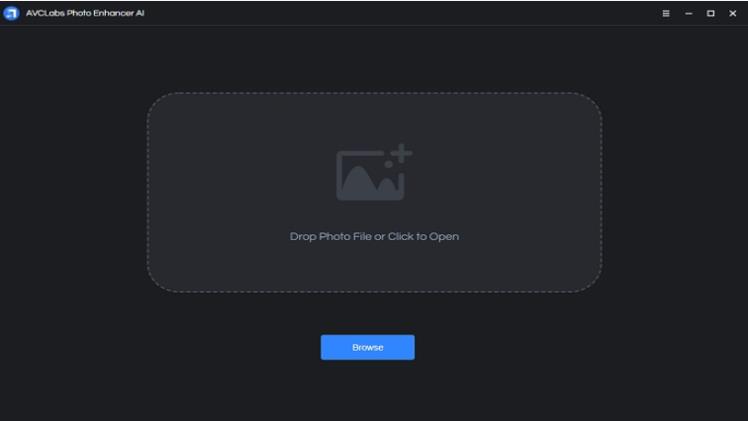
Drag and drop or click on the “Browse” button to add pixelated or low-res images to the program.

Step 2: Select the Model
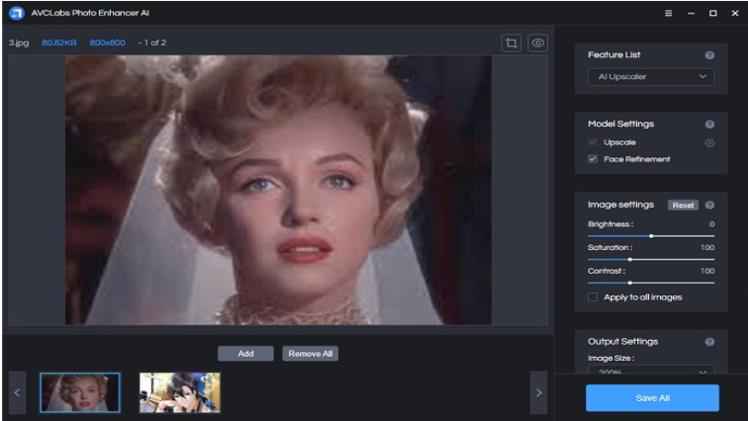
The program provides five basic models: AI Upscaler, AI Denoiser, AI Color Calibration, AI BG Removal and AI Colorizer. There is also a feature called New workflow, which enables you to create new workflows with any combination of those five basic models. To fix the pixelated image, simply choose AI Upscaler.
Step 3: Image and Output Settings
Different from other AI-based enhancers, AVCLabs Photo Enhancer AI provides users with more creative space. Before starting processing, users can adjust the brightness, saturation, and contrast of images.
In the output settings section, you can set the upscaling size, the output format and the save directory.
Step 4: Process and Save Images
After setting all parameters, click on the Eye button in the top-right corner to start processing. When it finishes, you can drag the white line to see the before and after contrast.
If you are satisfied with the processed images, you can click the Save button to save individual images or click Save All to save all the images that have been processed.
Bonus: How to Avoid Pixelating Images
The best way to solve problems is to avoid them at the root cause. Now that the article has covered what causes a pixelated image and how to fix a pixelated image, let’s talk about how you can prevent your images from being pixelated in the first place.
The first step is to make sure that you’re saving the images in full resolution and using the highest quality image possible. If you’re working with a low-resolution image, it’s likely that it will become pixelated when it’s enlarged. Always start with the highest quality image you have available, and resize it down as needed.
Next, pay attention to the resolution of your images. When you’re creating graphics for the web, it’s important to use images that have a resolution of 72 pixels per inch (ppi). This will ensure that your images look sharp on all devices. If you’re printing your images, you’ll need to use a higher resolution, typically 300 ppi.
Finally, avoid stretching your images too much. When you enlarge an image, it will become pixelated unless the original image is large enough to support the new size. It’s better to resize your image by using a percentage rather than an exact pixel amount.
Conclusion
It is annoying when pixelation makes an otherwise beautiful picture blurry. Unfortunately, pixelated images abound: images downloaded from websites are usually of limited resolution and pixelated when enlarged. Many photo editor applications do not support exporting edited images at full resolution, which can also result in poor quality or even pixelation of your images. While the good news is that there are programs like AVCLabs Photo Enhancer AI that help even people who don’t know anything about image editing to fix pixelated images quickly and easily.

